

How to Set Up Facebook Conversions API in Framer
Framer makes it incredibly easy to build beautiful websites. But when it comes to tracking Facebook ad conversions accurately, you need more than just the standard Facebook Pixel.
If you're running Facebook ads for your Framer site and want reliable conversion tracking that works despite ad blockers and iOS 14 restrictions, you need Facebook Conversions API (CAPI).
This guide shows you exactly how to set up CAPI on your Framer website - without writing code or dealing with complicated server configurations. New to CAPI? Start with our complete guide to Facebook Conversions API.
Why Framer Sites Need Facebook Conversions API
Your Framer website is fast and beautiful, but the Facebook Pixel alone has serious limitations:
Ad blockers block the Pixel. If your visitors use Safari, Brave, or any ad blocker, the Pixel might not fire at all. You lose 20-40% of your conversion data.
iOS 14 limits browser tracking. Since Apple's privacy changes, iPhone users can opt out of tracking. Most do. Your Pixel misses these conversions entirely.
Third-party cookies are dying. Browsers are eliminating cookie-based tracking. The Pixel relies on cookies. Server-side tracking doesn't. Learn more about the difference between server-side tracking and Pixel.
Facebook Conversions API solves these problems by sending conversion data directly from a server to Facebook, bypassing browser restrictions completely.
The result? More accurate tracking, better ad optimization, and higher Event Match Quality scores.
What You'll Need Before Starting
Before setting up CAPI on your Framer site, make sure you have:
✅ A Facebook ad account
✅ Admin access to your Framer workspace
Important: Don't remove your existing Pixel. CAPI and the Pixel work best together. Facebook automatically deduplicates events so you don't double-count conversions.
Method 1: Set Up CAPI with PixelFlow (No Code Required)
The easiest way to add Facebook Conversions API to your Framer site is using PixelFlow, a no-code tool built specifically for this purpose. PixelFlow loads both your Pixel & CAPI together for complete event coverage and deduplication so you don't need to worry about loading the pixel separately.
Step 1: Sign Up for PixelFlow
Go to PixelFlow.so
Click Get Started
Create your account
Select Framer as your platform

Step 2: Enter your website URL
Enter your website URL
(Optional) Choose a currency for your website if you sell eCommerce products
Step 3: Connect Your Facebook Pixel/Dataset
Next you need to add your Pixel name (this can be anything), Pixel ID (called Dataset ID in Facebook) and create an access token.
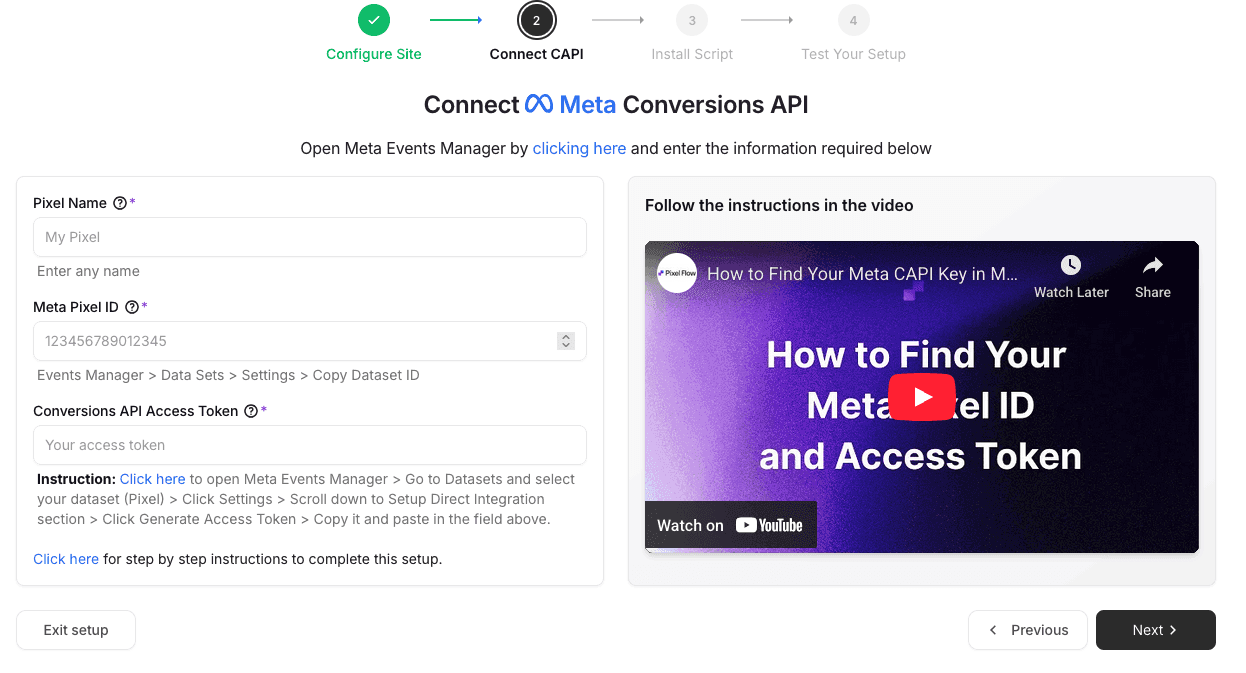
Go to Facebook Events Manager
Select your Pixel/dataset you want to send events to and copy the Dataset ID then paste it into PixelFlow in the "Meta Pixel ID" box
In Events Manager, with your dataset selected, click Settings and scroll down to Conversions API
Choose "Set up with Dataset Quality API"
Click Generate Access Token

Copy the access token and paste it into the Conversions API Access Token box in PixelFlow then press Next
Security note: Keep this token private. It gives access to send data to your Pixel.
Step 4: Install PixelFlow on Your Framer Site
Now you'll add PixelFlow's tracking script to your Framer site:
Copy the provided script snippet
Open your Framer project
Go to Site Settings (gear icon in top-right)
Click General → Custom Code
Paste the PixelFlow script in the End of
<head>tag sectionClick Save
Publish your Framer site
Important: The script goes in the <head> section, not the <body>. This ensures it loads before your page content.
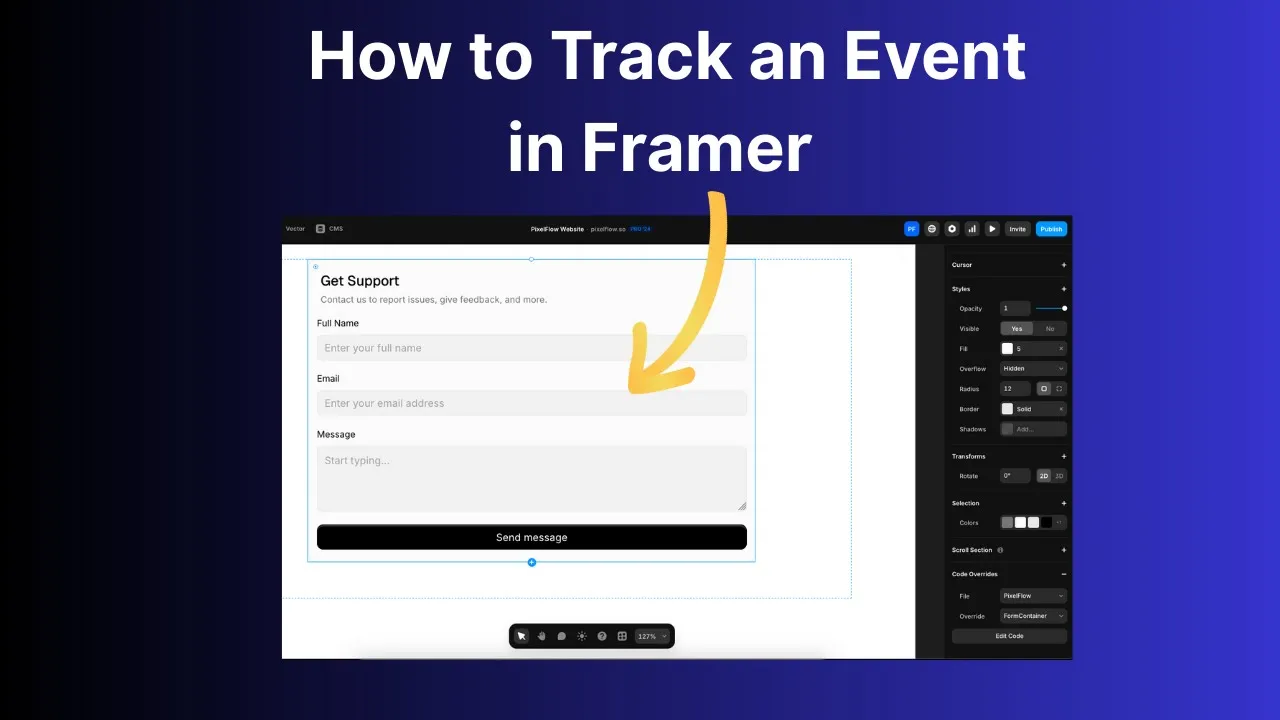
Step 5: Track Events (customer actions)
Now you have the script installed, you're automatically tracking PageView events using the Conversions API. Next you need to track more event types in one of two ways:
Trigger an event using a code snippet on a button, element etc. See the video below for a guide on how to do this:
Advanced Features for Better Tracking
PixelFlow includes several powerful features to improve your tracking even further:
1. Extract Data from URLs
If your confirmation pages include data in the URL parameters (like order value, product name, or customer email), PixelFlow can automatically extract this data and send it to Facebook. This improves Event Match Quality and gives Facebook more information for optimization.
For example, if your thank you page URL is: yoursite.com/thank-you?email=john@example.com&amount=49.99
You can configure PixelFlow to extract the email and amount parameters and send them with your Purchase event.
2. Event Blocking Rules
Sometimes you need to exclude certain traffic from triggering events (like internal team members, test purchases, or specific URL patterns). PixelFlow's event blocking rules let you set conditions to prevent events from firing in specific scenarios.
Step 6: Test Your Implementation
Before relying on your new setup, verify everything works:
Go to Facebook Events Manager
Select your Pixel
Click Test Events in the left sidebar
In the Test Events tab, select Server to see CAPI events
Visit your Framer site in a new browser tab
Complete an action (view a page, submit a form, etc.)
Return to Events Manager and confirm the event appears under Server events
Note: it can take up to 45 mins for "real events" to show up in Events Manager. You should see test events appearing in real-time. If you see events labeled with server badge, your CAPI setup is working correctly.
Step 8: Monitor Event Match Quality
Event Match Quality (EMQ) measures how well Facebook can match your events to user profiles:
In Events Manager, go to Overview
Check your Event Match Quality score for server events
Aim for Good (7.0+) or Great (8.0+)
Higher EMQ scores mean better ad attribution and optimization. PixelFlow automatically optimizes for high EMQ by sending customer information parameters when available. Learn more about how Facebook generates Event Match Quality scores.
Note - some events like PageViews are always going to have a relatively low EMQ score as its not possible to know the customers name, email, phone number with just a pageview event. In this case, its normal for PageViews to have an EMQ of around 5/10.
Method 2: Set Up CAPI Using Facebook's Conversions API Gateway (Advanced)
If you prefer managing everything within Facebook, you can use their Conversions API Gateway feature. This is more technical and requires ongoing maintenance, but doesn't require third-party tools.
Requirements:
Hosting environment with server access (note: Framer itself doesn't provide server-side capabilities)
Ability to set up cloud functions or server endpoints
Technical knowledge of API integration
High-Level Steps:
Set up a server endpoint (AWS Lambda, Google Cloud Functions, etc.)
Configure the endpoint to receive events from your Framer site
Forward events to Facebook's Conversions API
Implement event deduplication logic
Add error handling and logging
Reality check: This method requires significant technical expertise. For most Framer users, the no-code approach with PixelFlow is faster and more reliable.
What Events Should You Track on Your Framer Site?
The specific events depend on your website's purpose:
For E-Commerce Sites:
PageView: Track all page visits
ViewContent: Product page views
AddToCart: Add to cart clicks
InitiateCheckout: Checkout started
Purchase: Completed orders (most important!)
For Lead Generation Sites:
PageView: Track all page visits
ViewContent: Key landing pages
Lead: Form submissions
Contact: Contact form submissions
Schedule: Appointment bookings
For SaaS/Service Sites:
PageView: Track all page visits
ViewContent: Feature or pricing pages
CompleteRegistration: Sign-ups
StartTrial: Free trial starts
Subscribe: Paid subscriptions
Focus on tracking actions that indicate real business value. Every event you track gives Facebook better data for optimizing your ads. For a complete event strategy, read our guide on 7 Meta events you should be tracking.
Troubleshooting Common Issues
Events Not Showing in Test Events Tool
Problem: You've installed CAPI but don't see server events in Events Manager.
Solutions:
Double check that you've added the "Test Code" to your code snippet in PixelFlow (takes 1 min for your script to auto update)
Check that your tracking script is in the
<head>sectionConfirm you've published your Framer site after adding the script
Clear your browser cache and test again
Check PixelFlow dashboard for error logs
Low Event Match Quality Score
Problem: Your EMQ score is below 7.0 (rated "Poor" or "OK").
Solutions:
Tag and track customer information parameters where possible (email, phone, name)
Remember that some events are never going to have a high EMQ score
Duplicate Conversions in Reporting
Problem: Conversions appear to be counted twice.
Solutions:
Verify event deduplication is enabled (PixelFlow does this automatically)
Use the Meta Pixel Helper chrome extension to verify when a pixel is being loaded
Check that event IDs match between Pixel and CAPI
Ensure event names are identical (case-sensitive)
Confirm event timestamps are within 5 seconds of each other
Events Firing But Ads Not Optimizing
Problem: Events are tracked but ad performance hasn't improved.
Solutions:
Give Facebook 24-48 hours to collect data and optimize
Ensure you're tracking events that matter (purchases, leads)
Verify event values are correctly formatted (currency, numbers)
Check that you have sufficient event volume (at least 50/week per event)
CAPI on Framer: Best Practices
Always Use CAPI + Pixel Together
Don't disable your Pixel when you add CAPI. Running both simultaneously provides maximum tracking coverage. Facebook's deduplication ensures you don't double-count.
Note: PixelFlow loads both your CAPI and Pixel together for you so if you're using PixelFlow, just remember any additional pixel scripts and you're all set!
Track the Full Customer Journey
Don't just track purchases or leads. Track the path that leads there: PageView → ViewContent → AddToCart → InitiateCheckout → Purchase.
This gives Facebook more optimization signals and better understanding of customer behavior.
Include Customer Information When Possible
When you capture customer data (email from forms, phone numbers, names), send it to Facebook hashed. This dramatically improves Event Match Quality and attribution accuracy.
PixelFlow automatically handles hashing to protect privacy.
Monitor Your Event Match Quality Weekly
EMQ scores change as your traffic patterns change. Check weekly and optimize if scores drop. Aim to maintain "Good" or "Great" ratings.
Test After Any Website Changes
If you update your Framer site structure or forms, test your tracking afterward. Events can break if page elements change.
Why PixelFlow is the Best Solution for Framer + CAPI
While there are several ways to implement Conversions API, PixelFlow is purpose-built for no-code platforms like Framer:
✅ No coding required - Install with a simple script snippet
✅ Automatic deduplication - Prevents double-counting conversions
✅ High Event Match Quality - Optimized for best attribution scores
✅ Real-time testing - Verify events are tracking correctly
✅ Form tracking - Easily captures form submissions as Lead events
✅ Purchase tracking - Tracks e-commerce conversions with proper values
✅ GDPR compliance - Respects user consent and privacy preferences
For Framer users who want reliable Facebook ad tracking without technical headaches, PixelFlow is the fastest path to implementation.
Next Steps: Optimize Your Facebook Ad Tracking
Now that you've set up Facebook Conversions API on your Framer site, you're tracking conversions more accurately than 90% of advertisers.
But accurate tracking is just the foundation. Here's what to do next:
1. Review your Event Match Quality score - Aim for 8.0+ for optimal performance
2. Verify all critical events are firing - Test purchases, leads, and key conversions
3. Check your ad reporting - You should see higher conversion numbers within 24-48 hours
4. Optimize based on complete data - Use your improved tracking to make better ad decisions
Want to go deeper? Check out these related guides:
What is Facebook Conversions API? - Understand how CAPI works
Server-Side Tracking vs Pixel - Compare tracking methods
How Facebook Generates Event Match Quality Scores - Improve your EMQ
7 Meta Events You Should Be Tracking - Event strategy guide
Why Facebook Ads Underreport Conversions - Attribution issues explained
Ready to set up server-side tracking on your Framer site? Get started with PixelFlow and start tracking conversions accurately in minutes.


